Let me preface this post by saying that the following is by no means an advertisement for any particular brand or me showing off (because believe me, none of my gear is expensive by professional standards). Nor is the below gospel for what camera gear you should buy. The gear I own is stuff that I like and what I feel suits the type of photography that I do. I felt like at some point someone would be curious as to what camera gear I use, so let me give a run down of what I use to get the job done.
I’m gonna break down these gear posts into four distinct categories: bodies, lenses, bags, and accessories.
Bodies
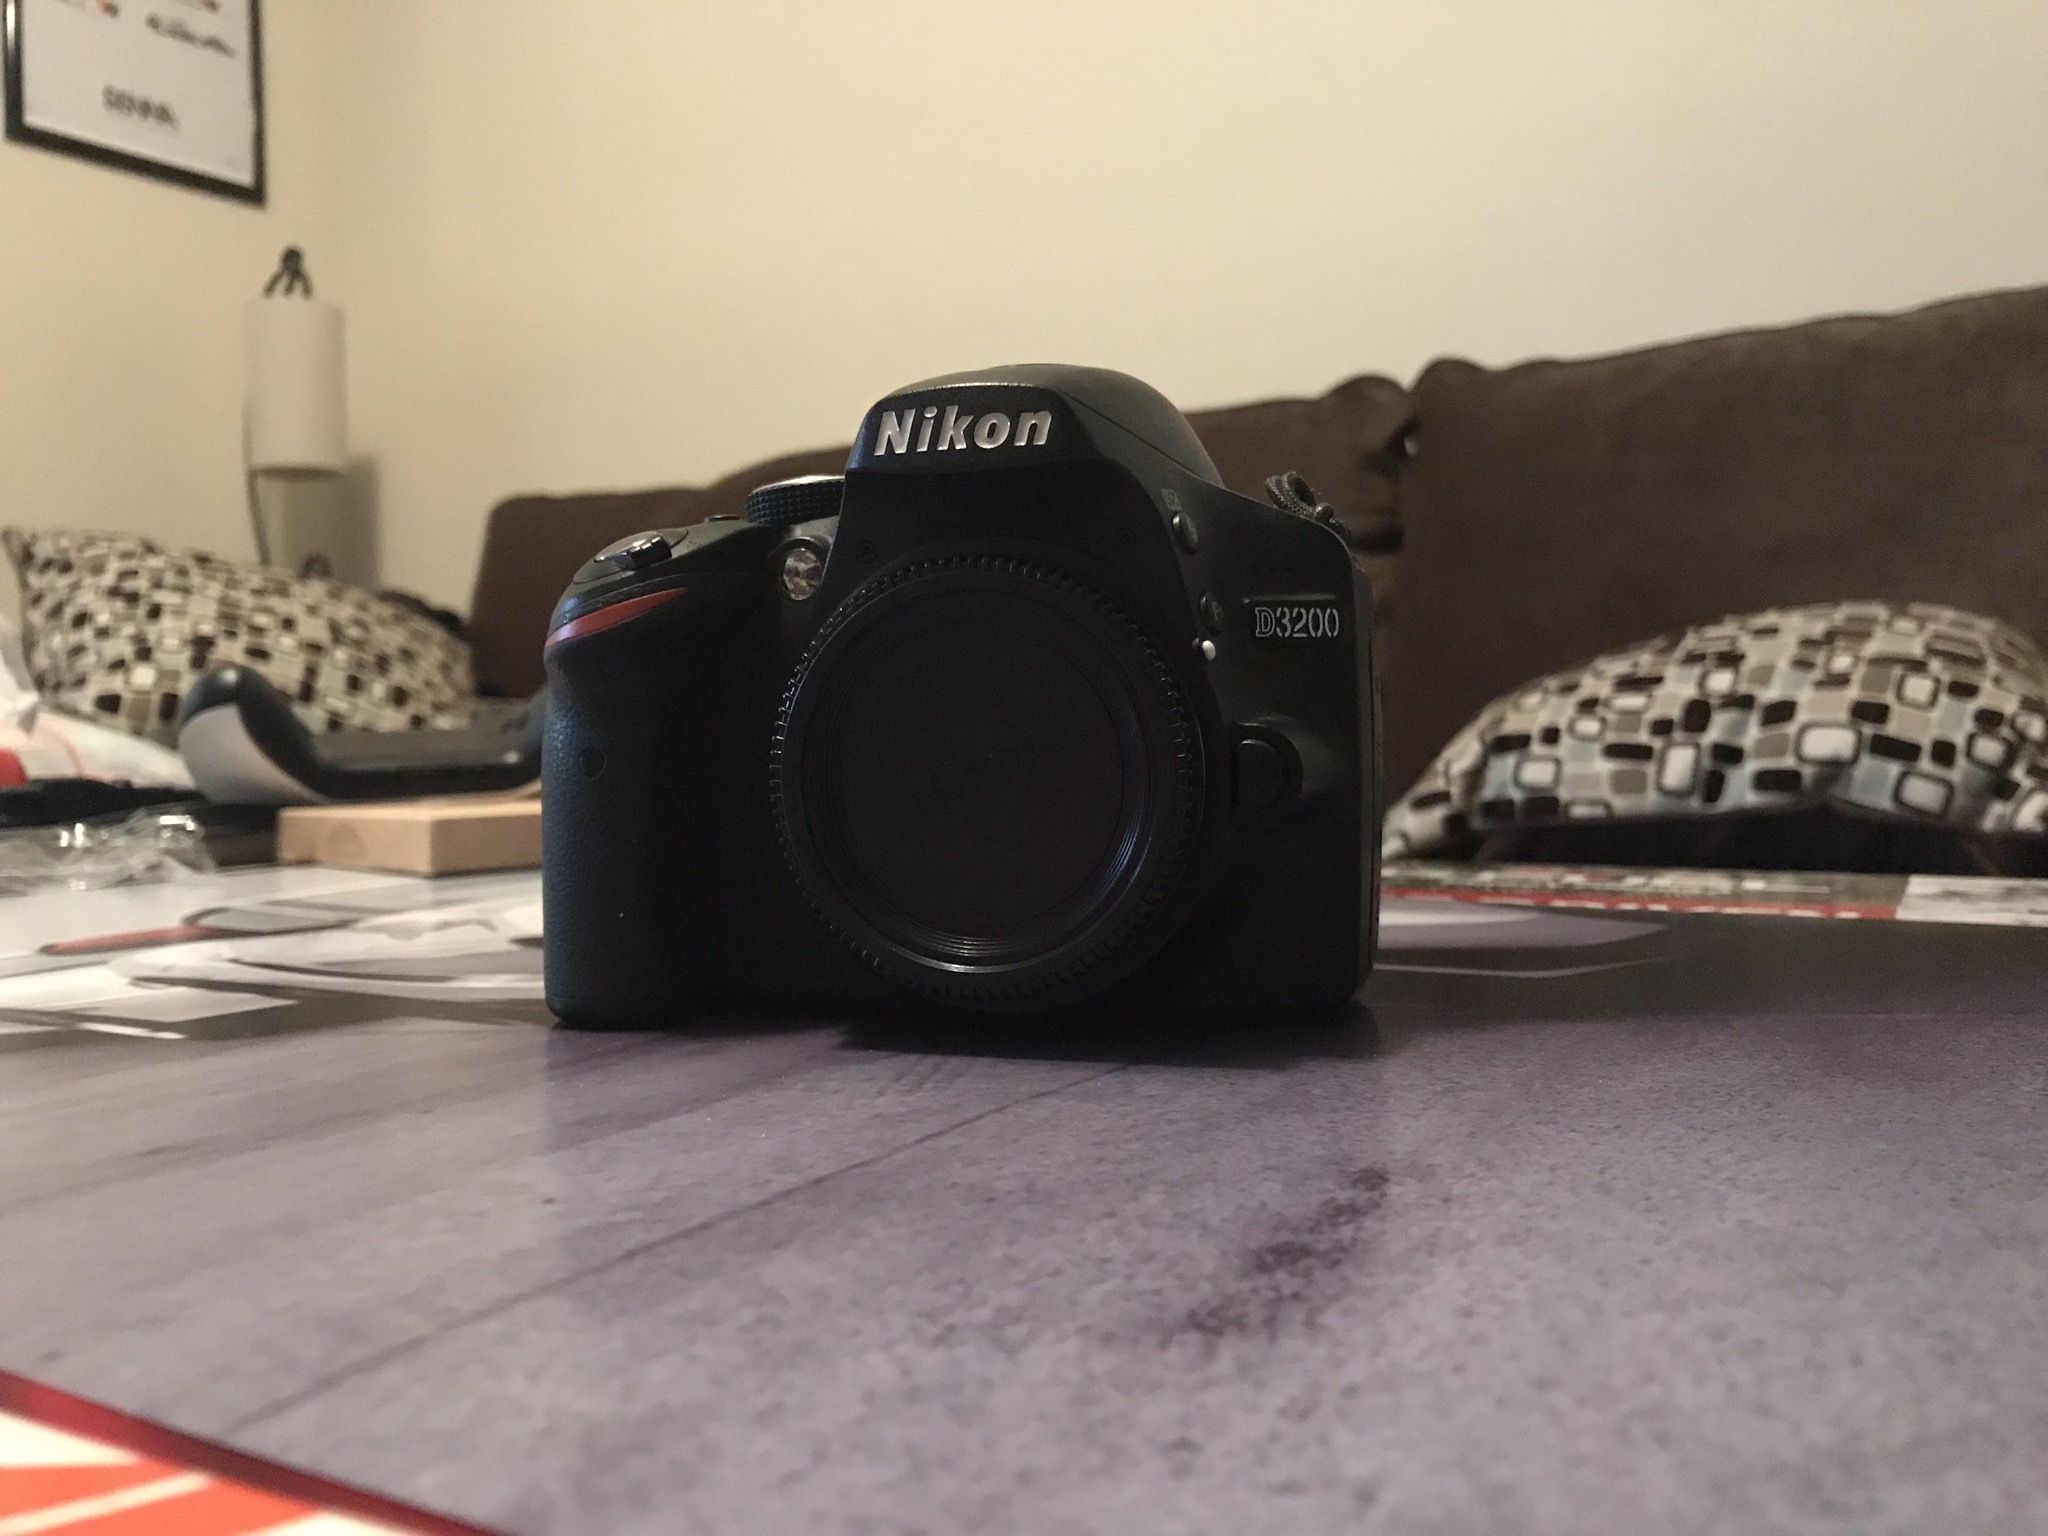
My current body is the Nikon D3200 shown below:
At the time of purchasing the above camera, I didn’t know anything about photography, let alone cameras. I was just in my local Target with my dad during black Friday and decided to get this camera kit (with the 18-55mm and 55-200mm lens) over the equivalent Canon kit based purely on the numbers printed on the display. Unfortunately for photography, once you buy a certain camera brand you’re kinda stuck in their ecosystem as far as lenses are concerned unless you’re willing to dump everything for a loss and spend money switching to another brand. I personally don’t have a brand preference, it’s just that since I entered this hobby with a Nikon body / lenses I’m kinda stuck with the Nikon F-mount unless I want to sell everything for less and start over again (which I cannot afford to do at the moment).
The Nikon D3200 is nothing special. It was (at the time) Nikon’s entry level DSLR. There are some things about the camera that I don’t like, but overall the body does what I want and has decent specs for how cheap it is. The camera is an APS-C body (crop sensor, meaning that focal lengths / apertures need to be multiplied by 1.5), shoots 24.2MP photos, has a decent auto focus and light metering system, and good battery life. Some things I wish this camera had was a tilt / flip screen, more auto focus points, and better low light capabilities, but currently I am able to work around these minor annoyances.
Lenses
Currently for the above camera I have the two lenses shown below:
Nikon AF-S 35mm F1.8G DX (Left), Nikon AF-S 18-300mm F3.5-6.3G VR DX (Right)
As mentioned in my first blog post, the 18-300mm (pictured right) was my then “dream” lens and was responsible for me getting back into photography. I wanted the 18-300mm as a “do it all” lens since it covers a wide focal range, from the wide angle of the 18mm to the zoomed in of the 300mm. This lens is great for 90% of the photos that I take. The two downsides of my 18-300mm are the following: low max aperture and DX (APS-C) format. The low max aperture (F6.3 at its max zoom) means this lens is not good in low light situations. The DX format of the lens means that this lens is designed for APS-C (crop sensor) cameras. While DX lenses are generally cheaper than their full frame (FX) counterparts and are compatible with full frame camera bodies, using a DX lens on a full frame body will result in heavy vignetting (black shadows around the edges) of your pictures. Luckily modern full frame cameras have the ability to shoot in DX mode to alleviate the vignetting issue when using DX lenses, but what’s the point of buying a full frame camera if you’re going to use APS-C glass on it?
The second lens I own is the 35mm on the left. This lens differs from the 18-300mm in that it is a “prime” lens, meaning that it has a fixed focal length. My 35mm also has a larger max aperture of F1.8, which allows it to have better low light performance and produce pictures with lots of bokeh (blurry backgrounds / foregrounds). An example of “bokeh” is shown below:
Porsche 911 GT3 - Sunset GT (8/11/2019)
Like the 18-300mm, my 35mm shares the similar drawback of being a DX lens. However, prime lenses do have some advantages. Prime lenses are typically cheaper compared to zooms, are available with larger max apertures, and typically produce sharper images.
Bags
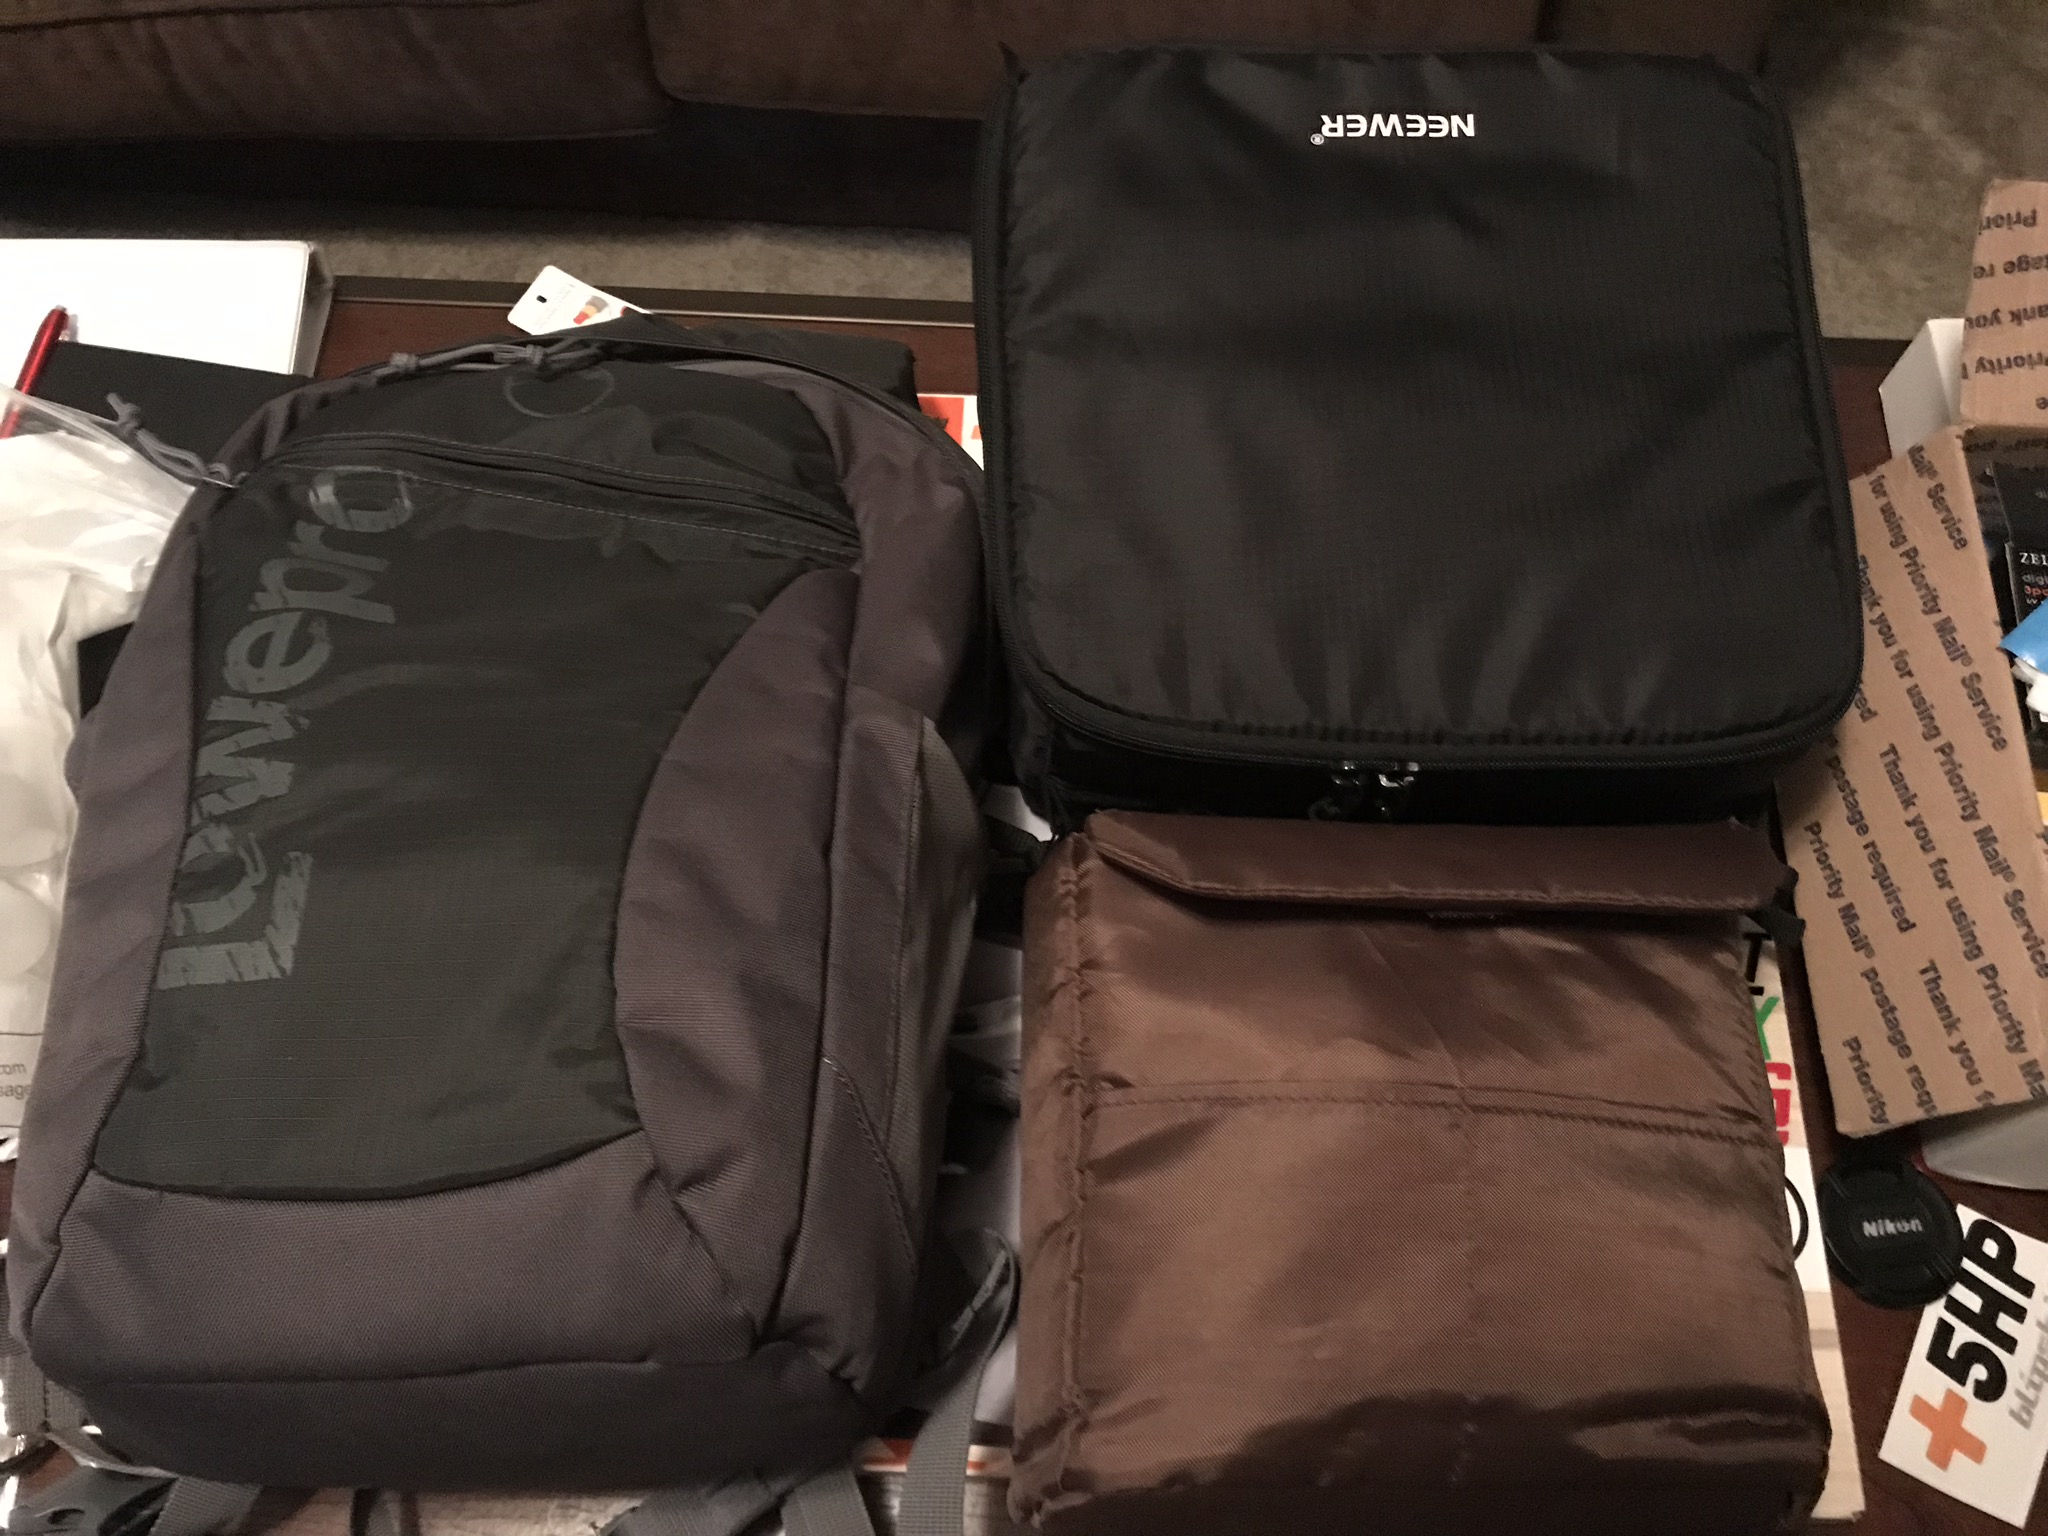
I’ll admit that I have a bag collecting problem, but we’ll focus on the three types of camera bags that I own / use:
The small, brown bag is known as a "camera insert” bag. Camera insert bags are great because they allow you to transform any ordinary bag into a camera bag. One of the things I look for with camera bags is stealthiness. I am personally not a huge fan of dedicated camera backpacks since they obviously look like you’re carrying around expensive camera equipment and paint a target on your back for thieves. By using a camera insert bag with a normal backpack / messenger bag / tote / whatever bag you can stealthily carry your camera gear around without drawing attention to yourself. I personally like to use the camera insert bag when I am going on hikes where I’ll be carrying a dedicated hiking backpack.
The large, black bag is a dedicated camera bag. This bag is like a soft-shelled version of a pelican case. Inside is soft padding with Velcro inserts that are customizable for whatever gear you want to put inside. I like to take this bag on planned photo shoots where I’ll need a variety of gear to get the job done.
The last bag I use is my camera backpack pictured on the left. This backpack has a dedicated camera compartment that comfortably fits my camera body and two lenses while having normal storage for additional accessories. The primary reason why I love this camera backpack is that it looks like an ordinary backpack. The camera compartment is stealthily hidden away on the back side and everything I use for everyday shooting fits neatly inside.
Accessories
Camera accessories come in all shapes and sizes and I use plenty of them. To keep things simple I’m going to break down accessories into a few simple categories: straps, tripods / monopods, filters, and misc.
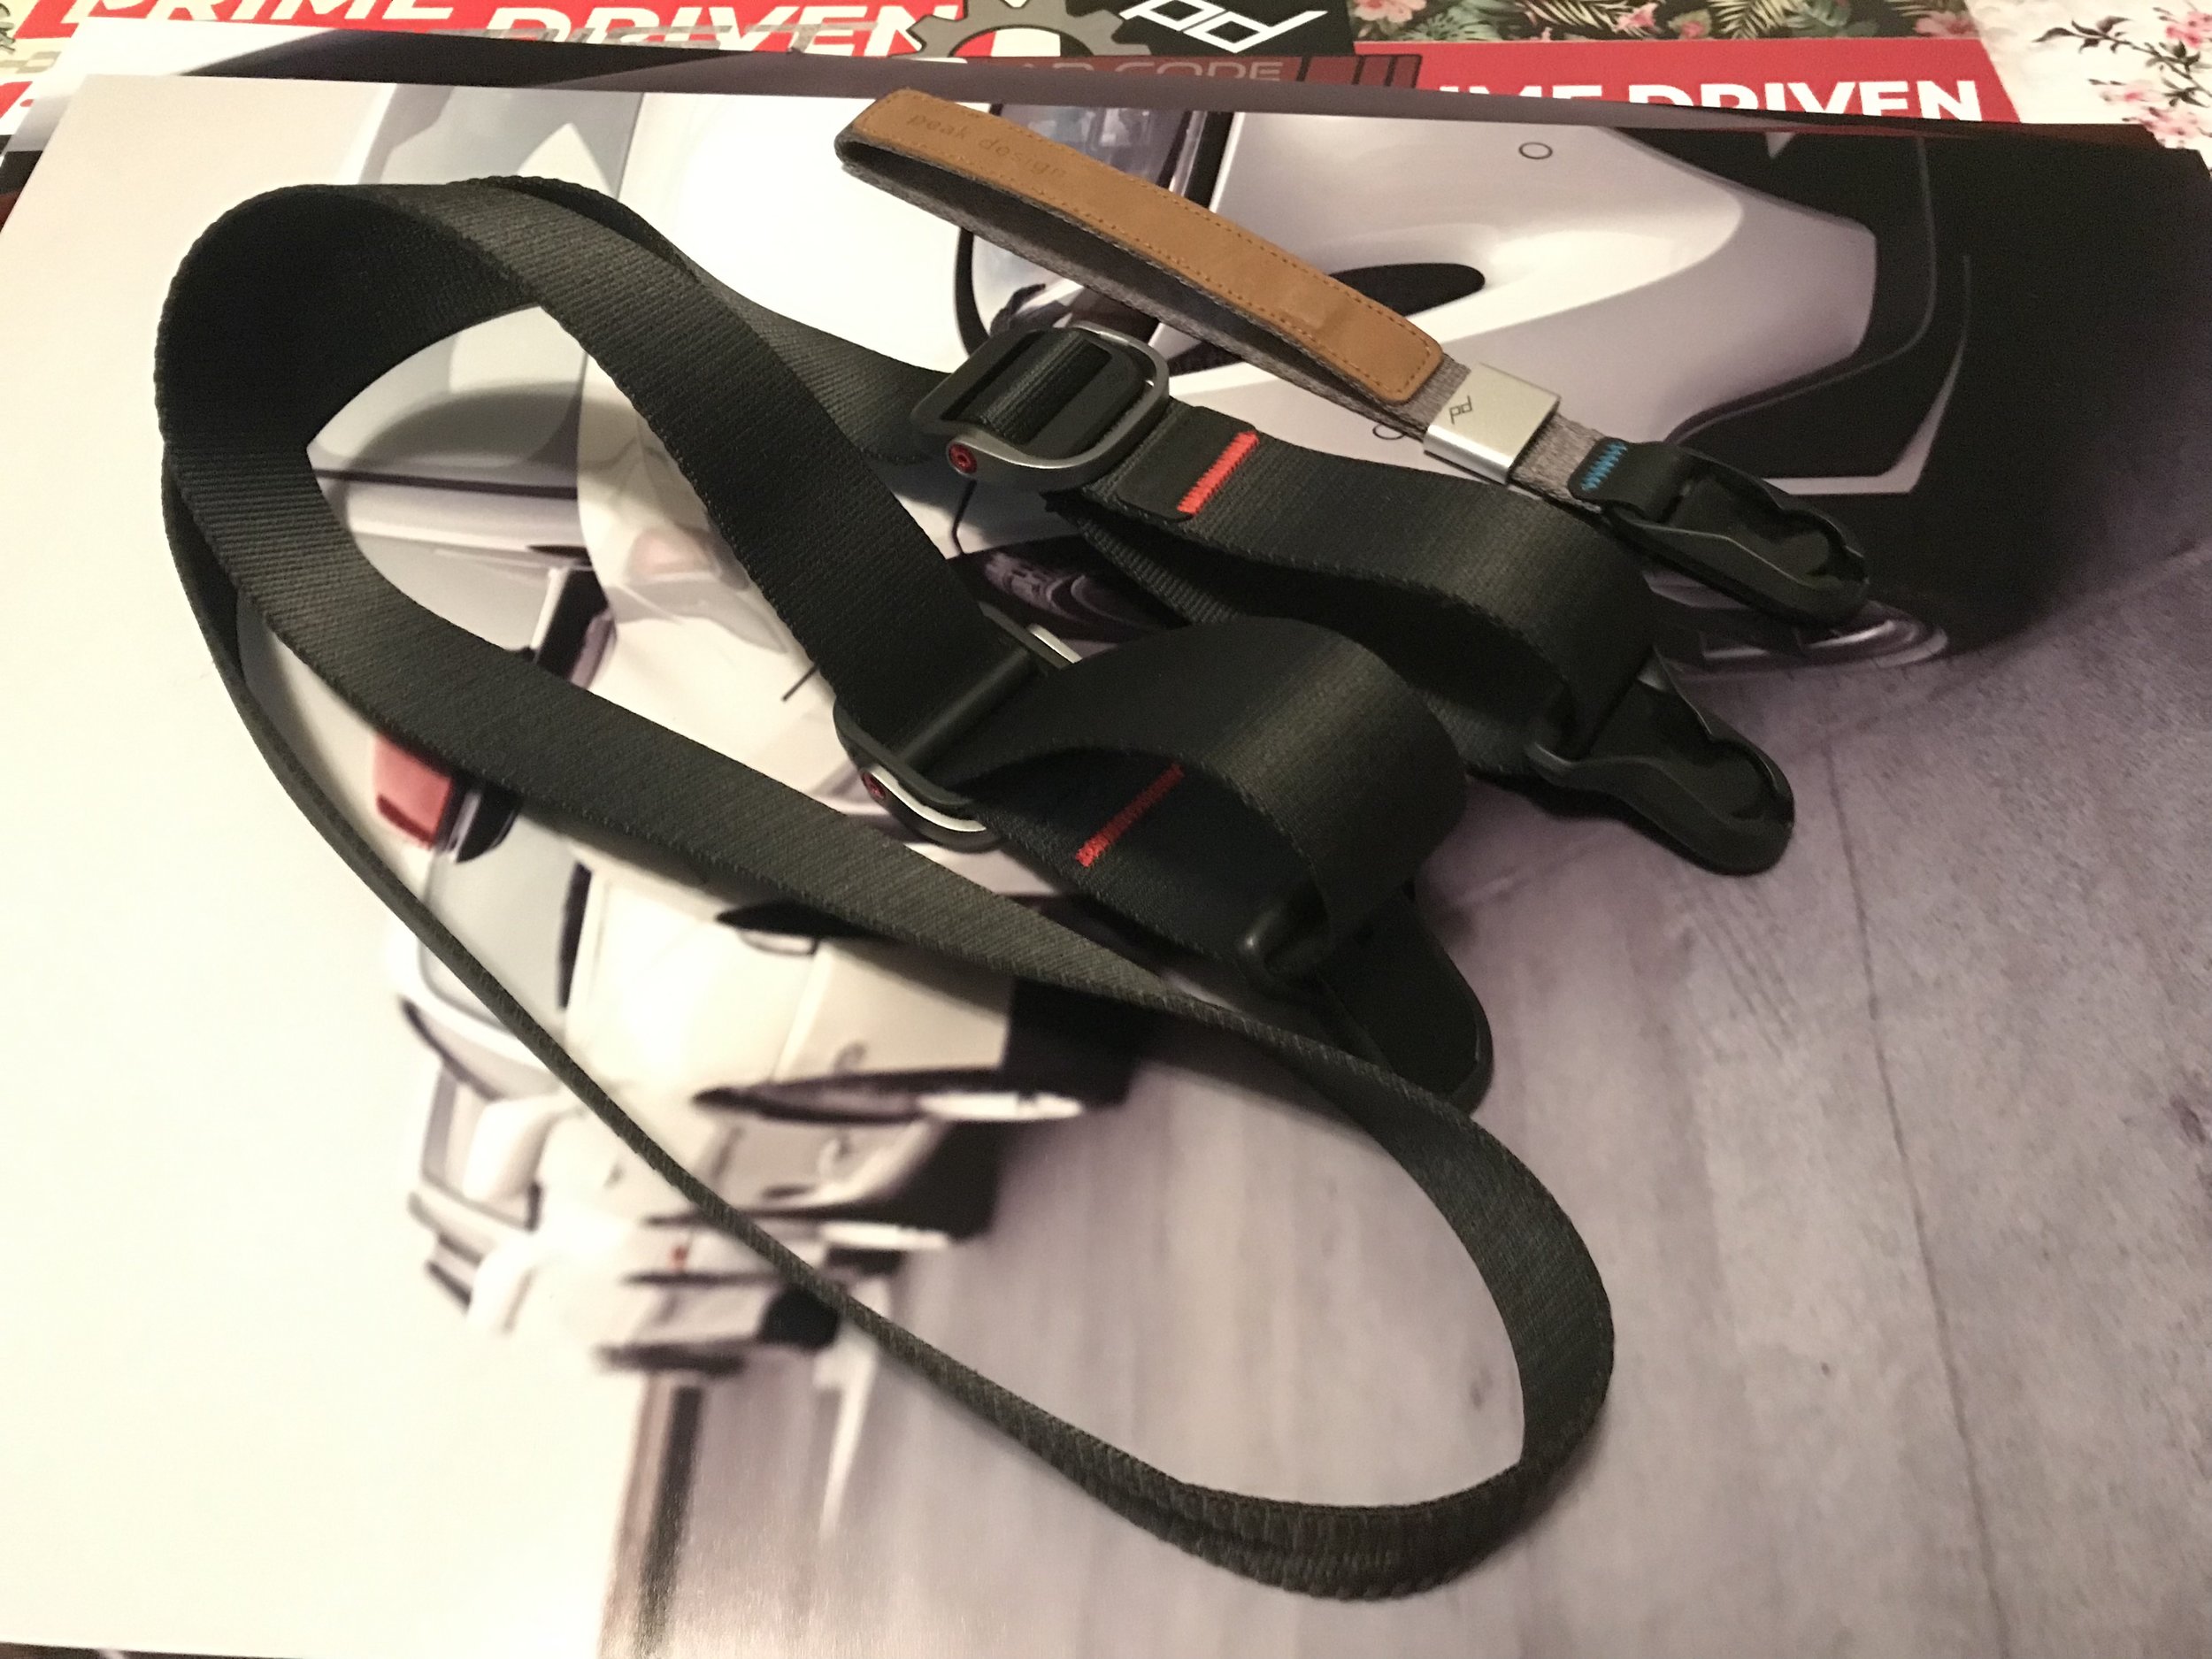
Starting off with the simplest of them all are camera straps:
Peak Design Slide Light (black), Peak Design Cuff (grey / brown)
Currently I am using the Peak Design strap / wrist strap and am a huge fan of their ecosystem. The Peak Design strap system uses some nifty quick disconnects that allow you to quickly change your camera out / store your camera. The strap is made of a “seat belt” like material that allows you to quickly “slide” your camera from your waist up to your face in order to take a picture. Additionally, flipping the strap over reveals a grippy surface that keeps your camera from swinging around by your side while you are moving around. The wrist strap (or “cuff”) allows for safe hand carrying of your camera while having the ability to convert to a bracelet while your camera is stored away.
The second most common camera accessories are tripods / monopods:
Manfrotto mini tripod (bottom left), Manfrotto monopod (middle), Sunpak tripod (top right)
Tripods / monopods are handy tools that allow you to steadily support / aim your camera to get the ideal shot. These accessories are particularly useful for doing landscape / long exposure photos as those types of photography require the camera to be stable. I typically carry the mini tripod with me at all times since it is light, compact, and is useful for an impromptu long exposure / group photo. The larger tripod I usually only bring with me when I am going on a planned photoshoot to do landscapes / long exposures. My large tripod is a cheap one that you can get at any electronics store and does the job OK, but if you are wanting to be more serious about doing videography or any other type of shooting that requires heavy tripod use I would recommend buying something better. The monopod is typically used for when I need to have some added stability while still being able to be mobile, such as photographing moving subjects with a zoom lens.
Probably one of the more overlooked camera accessories are filters:
Before the digital age of Photoshop and Instagram photographers had to rely on physical filters to apply effects to their photos. Filters come in a variety of sizes depending on your lens’ filter thread size and the types of filter effects are numerous. The most common types of filters that I use are polarizers and neutral density filters. Polarizers allow you to eliminate harsh reflections from your photos and I always keep one on all of my lenses. Neutral density filters essentially act as a “shade” for your lens and artificially stops down the light entering your lens. ND filters are particularly useful for when you are shooting in bright daylight (which is 99% of SoCal in the summer) and you want to use larger apertures such as F1.8. Larger apertures allow more light into your camera’s sensor, so in order to get the proper exposure you would need a low ISO and high shutter speed. Most of the time when shooting at F1.8 in broad daylight I find that my camera’s shutter speed is maxed out, so adding an appropriate ND filter on my lens allows me to drop the shutter speeds down to something more reasonable. ND filters are also necessary for long exposure photography as you can acquire ones that will stop your exposure down by as many as 10 stops in order to allow you to shoot with very slow shutter speeds and still get the right exposure.
Lastly we’ll take a look at all the other miscellaneous accessories I carry:
The obvious items are a battery pack and charging cable for my phone along with some sunscreen to keep myself from getting burned by the harsh SoCal sun while I’m outside taking pictures. Next up are a few basic camera necessities such as a spare battery, spare strap quick disconnects, and an allen wrench for camera base plates. The other items are all related to camera care. I always carry around a bottle of cleaning solution and microfiber cloths to clean my lenses and filters. The brush / bulb are used to clean the mirror / sensor in my camera body as those are delicate items and cannot be cleaned with solution and cloths like lenses and filters.
I hope you found this post interesting and got an idea of what type of gear to get if you want to start out in photography. Granted, you do not need everything that I have shown above (really all you need is a camera and a lens!), the gear I own is what I have found to help me take the photos that I like to shoot. Like always, feel free to leave a comment below.
Thanks,
J. Stitt


